CubeAI使用
想要自行体验使用STM32进行超级轻量级模型的部署,需要具备以下的知识:
- 编程语言:熟悉C和python
- 基础知识:熟悉基础的机器学习的框架,例如TensorFlow等
0.什么是神经网络
神经网络的基础知识可以看这一篇CSDN博客:https://blog.csdn.net/illikang/article/details/82019945
作为使用方,你可以把神经网络理解为一个黑箱,给定输入,然后给你输出~
1.搭建一个神经网络
1.1.模型搭建
首先我们需要从最最简单的例子说起,这里是我们的目标是预测正弦函数。给定一个输入,范围(0, 180),输出其对应的正弦值范围(0, 1)。我们搭建的简单的网络结构如下图所示:

当然你可以自行试着随便搭建尝试。
1.2.生成sin(x)的数据,进行模型的训练
在仓库中的2.software/2.Advanced/1.CubeAI./python_code文件夹中已经给出所有的文件,请自行查看。其中test为模型的效果测试,train为模型训练,
sine_gen为sin的数据生成,生成的csv内容可以自行查看。

在这里生成sin(x)的一系列数据后,使用keras框架搭建模型进行训练,激活函数使用tanh,没有使用sigmod是因为其不能表达负数的部分。学习率设置为0.001,epoch设置为2000。最后生成.h5和.tflite文件。
#导入工具包
import tensorflow as tf
import pandas as pd
import numpy as np

#读取数据
data = pd.read_csv('./Embedded_things/sin_values.csv', sep=',', header=None)
raw_x = data.iloc[:,0].astype(float)
sinex = data.iloc[:,1].astype(float)
print(sinex.shape)

#建立模型
model = tf.keras.Sequential()
model.add(tf.keras.layers.Dense(units=10, activation='tanh', input_shape=(1,)))
model.add(tf.keras.layers.Dense(units=5, activation='tanh'))
model.add(tf.keras.layers.Dense(units=1))
model.summary()

model.compile(optimizer=tf.keras.optimizers.AdamW(0.001),
             loss=tf.keras.losses.mse,                      #loss使用均方差,刚才的分类用的交叉熵
             metrics=[tf.keras.metrics.mse])
history = model.fit(x=raw_x, y=sinex, epochs=2000)

print(model.evaluate(raw_x, sinex))

#保存模型
model.save('./Embedded_things/sine_calcu.h5')

#转换模型为tf lite格式 不量化
load_model = tf.keras.models.load_model('./Embedded_things/sine_calcu.h5')
converter = tf.lite.TFLiteConverter.from_keras_model(load_model)
tflite_model = converter.convert()
open("./Embedded_things/sine_calcu.tflite", "wb").write(tflite_model)
2.STM32工程创建
2.1.打开CubeMX,把常规的设置都设置好,打开串口等
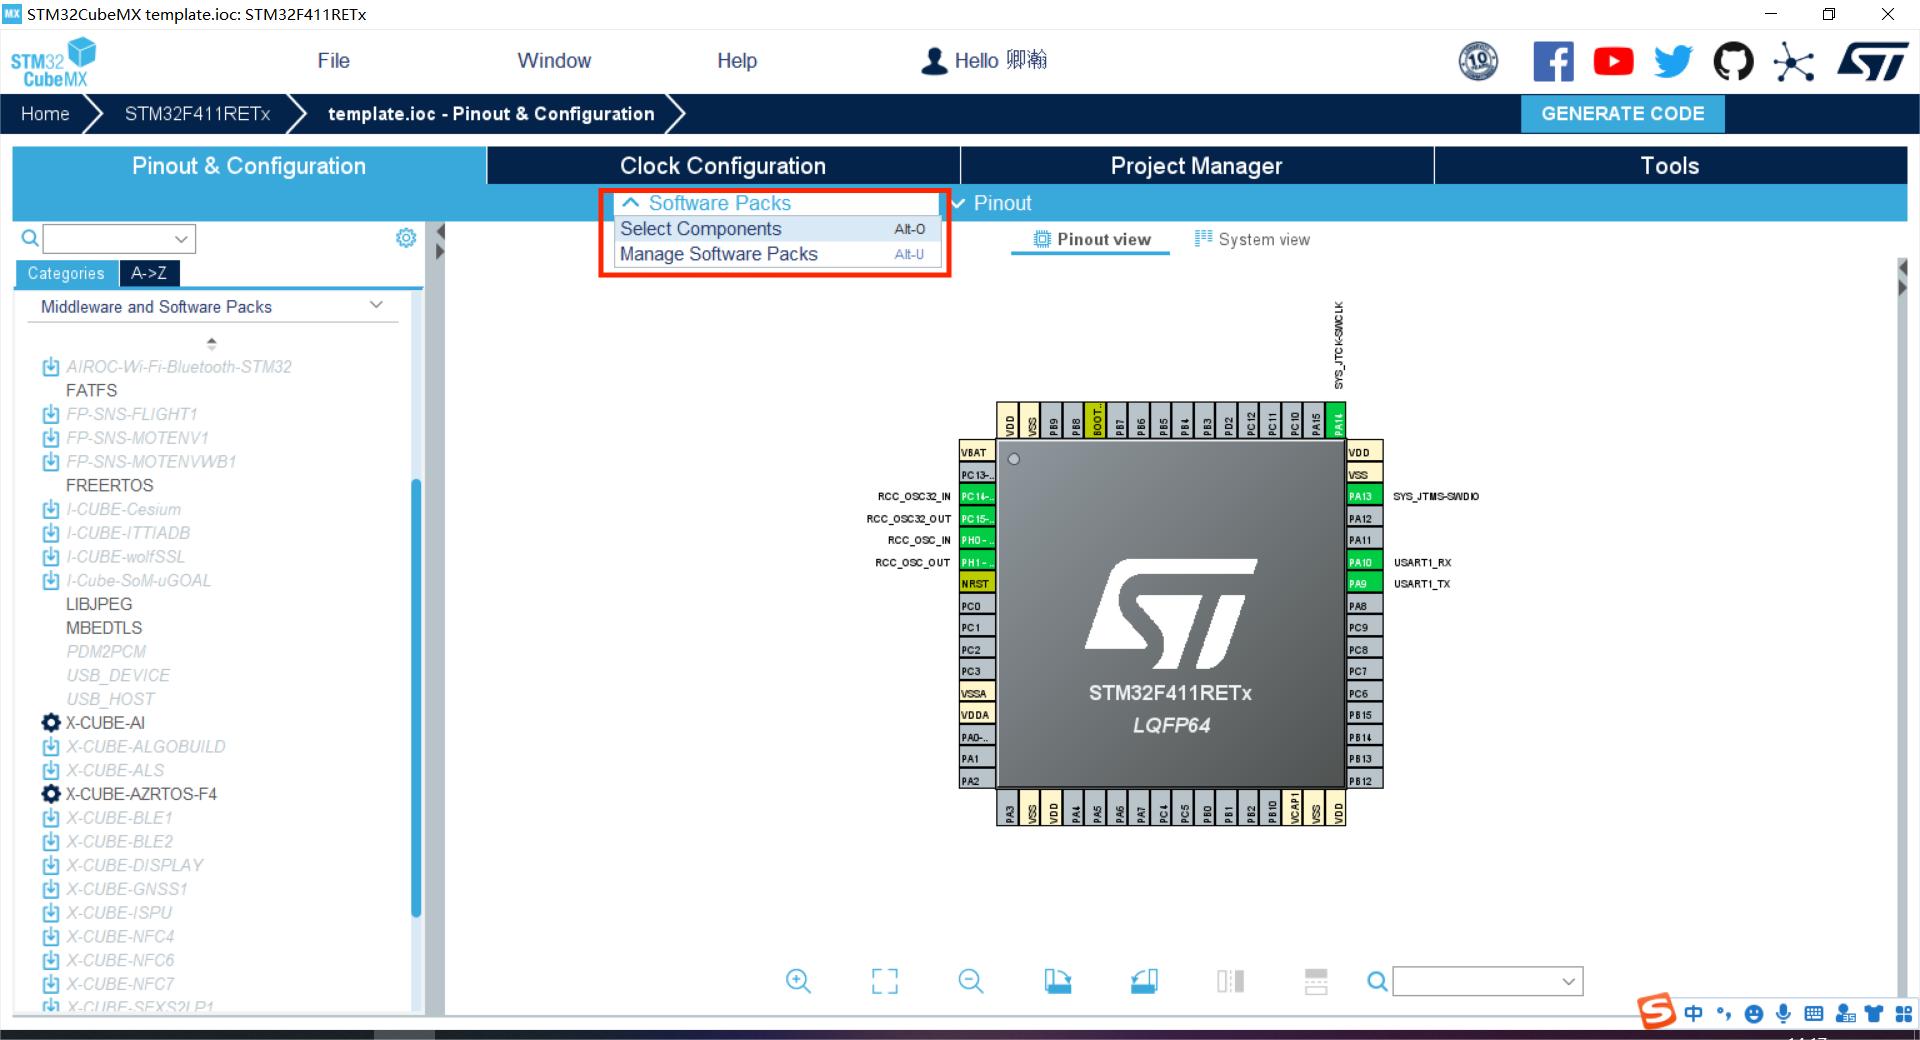
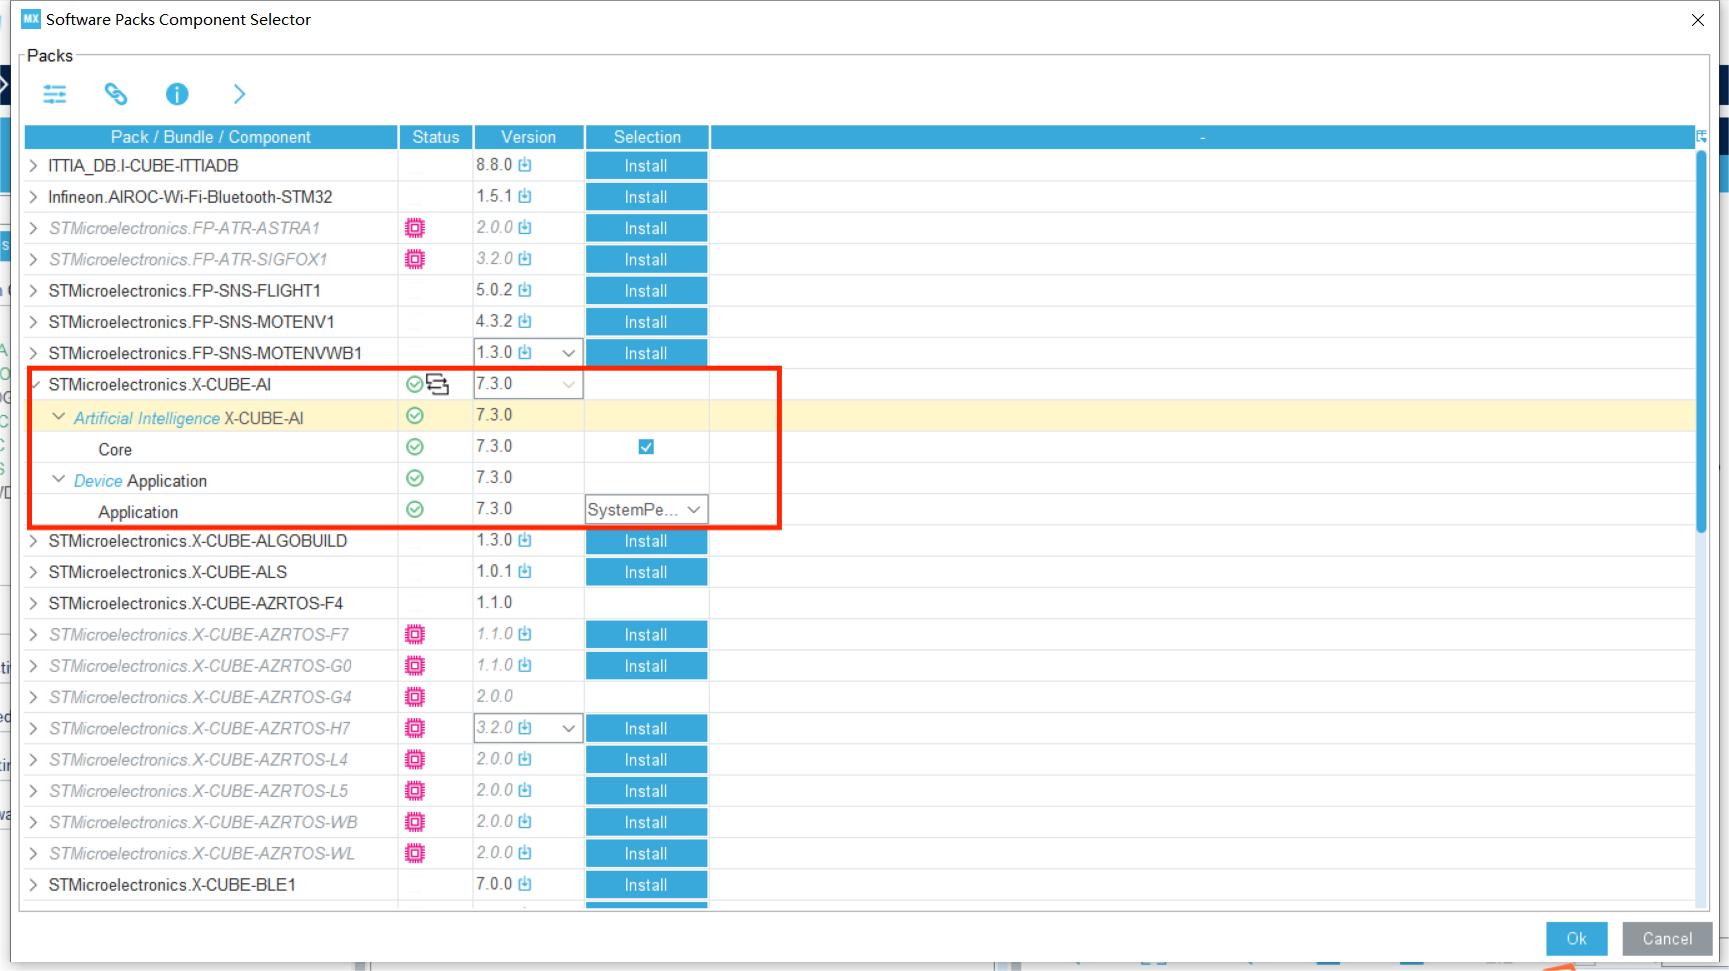
2.2.打开select components,选上X-CUBE-AI
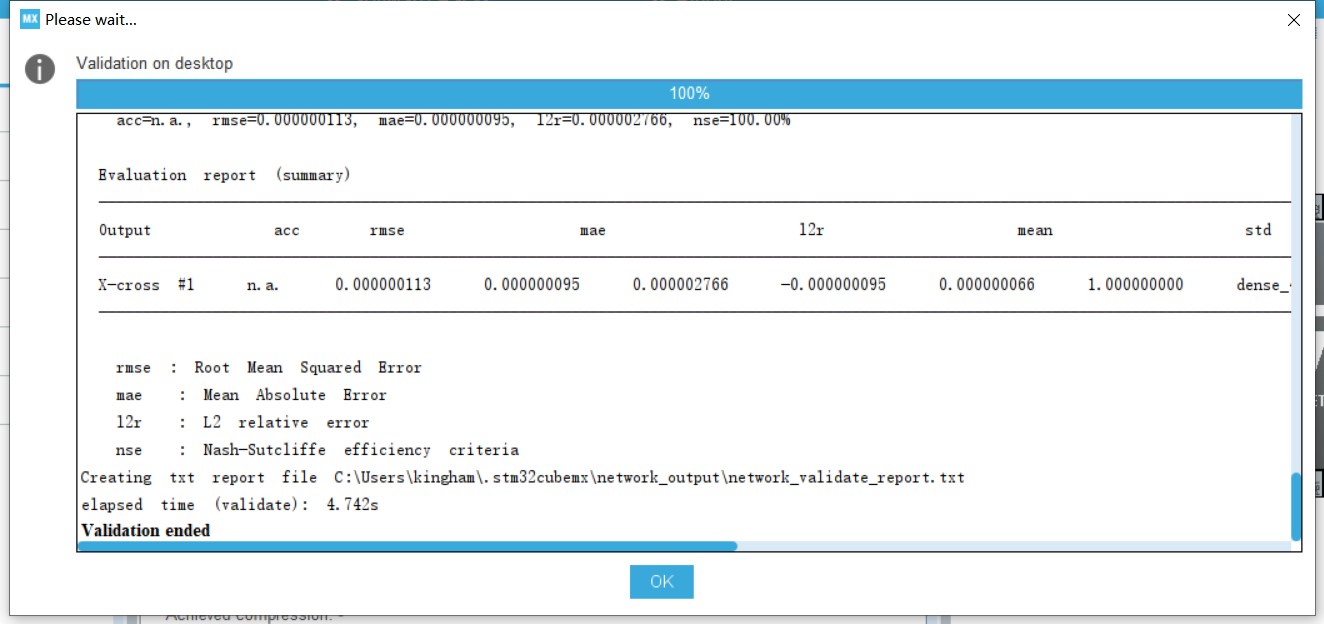
2.3.添加网络,选择你的模型(.h5或.tflite),再进行验证

2.4.生成工程,更改代码
在main中,找到MX_X_CUBE_AI_Process()函数,然后更改其中的aiSystemPerformanceProcess()函数,更改为如下内容。大致是设定输入为0~180,然后通过我们的网络推理后,得到输出y,我们将y输出出来,看看输出的y与真实的sin(x)是否拟合比较好。
各个函数其具体含义读者可以阅读手册或看API深入了解,这里不过多阐述。
int aiSystemPerformanceProcess(void)
{

    int idx = 0;
    int batch = 0;
    float y_pred;
    ai_buffer ai_input[AI_MNETWORK_IN_NUM];
    ai_buffer ai_output[AI_MNETWORK_OUT_NUM];

    ai_float input[1] = {0};  // initial
    ai_float output[1] = {0};

    if (net_exec_ctx[idx].handle == AI_HANDLE_NULL)
    {
        printf("E: network handle is NULL\r\n");
        return -1;
    }

    ai_input[0] = net_exec_ctx[idx].report.inputs[0];
    ai_output[0] = net_exec_ctx[idx].report.outputs[0];

    //ai_float test_data[] = {0, 1, 2, 3, 4, 5, 6, 7};
    uint16_t i=0;
    while(i<=180)
    {
      i++;
      if(i == 180)
      {i=0;}
        input[0] = i;
        output[0] = 0;
        ai_input[0].data = AI_HANDLE_PTR(input);
        ai_output[0].data = AI_HANDLE_PTR(output);
        batch = ai_mnetwork_run(net_exec_ctx[idx].handle, &ai_input[0], &ai_output[0]);
        if (batch != 1)
        {
            aiLogErr(ai_mnetwork_get_error(net_exec_ctx[idx].handle),
                    "ai_mnetwork_run");
            break;
        }
        y_pred = sin(input[0]*acos(-1)/180);
        printf("input, y_pre, y_ture: %.2f, %.2f, %.2f\r\n", input[0], output[0], y_pred);
        HAL_Delay(100);

    }
}
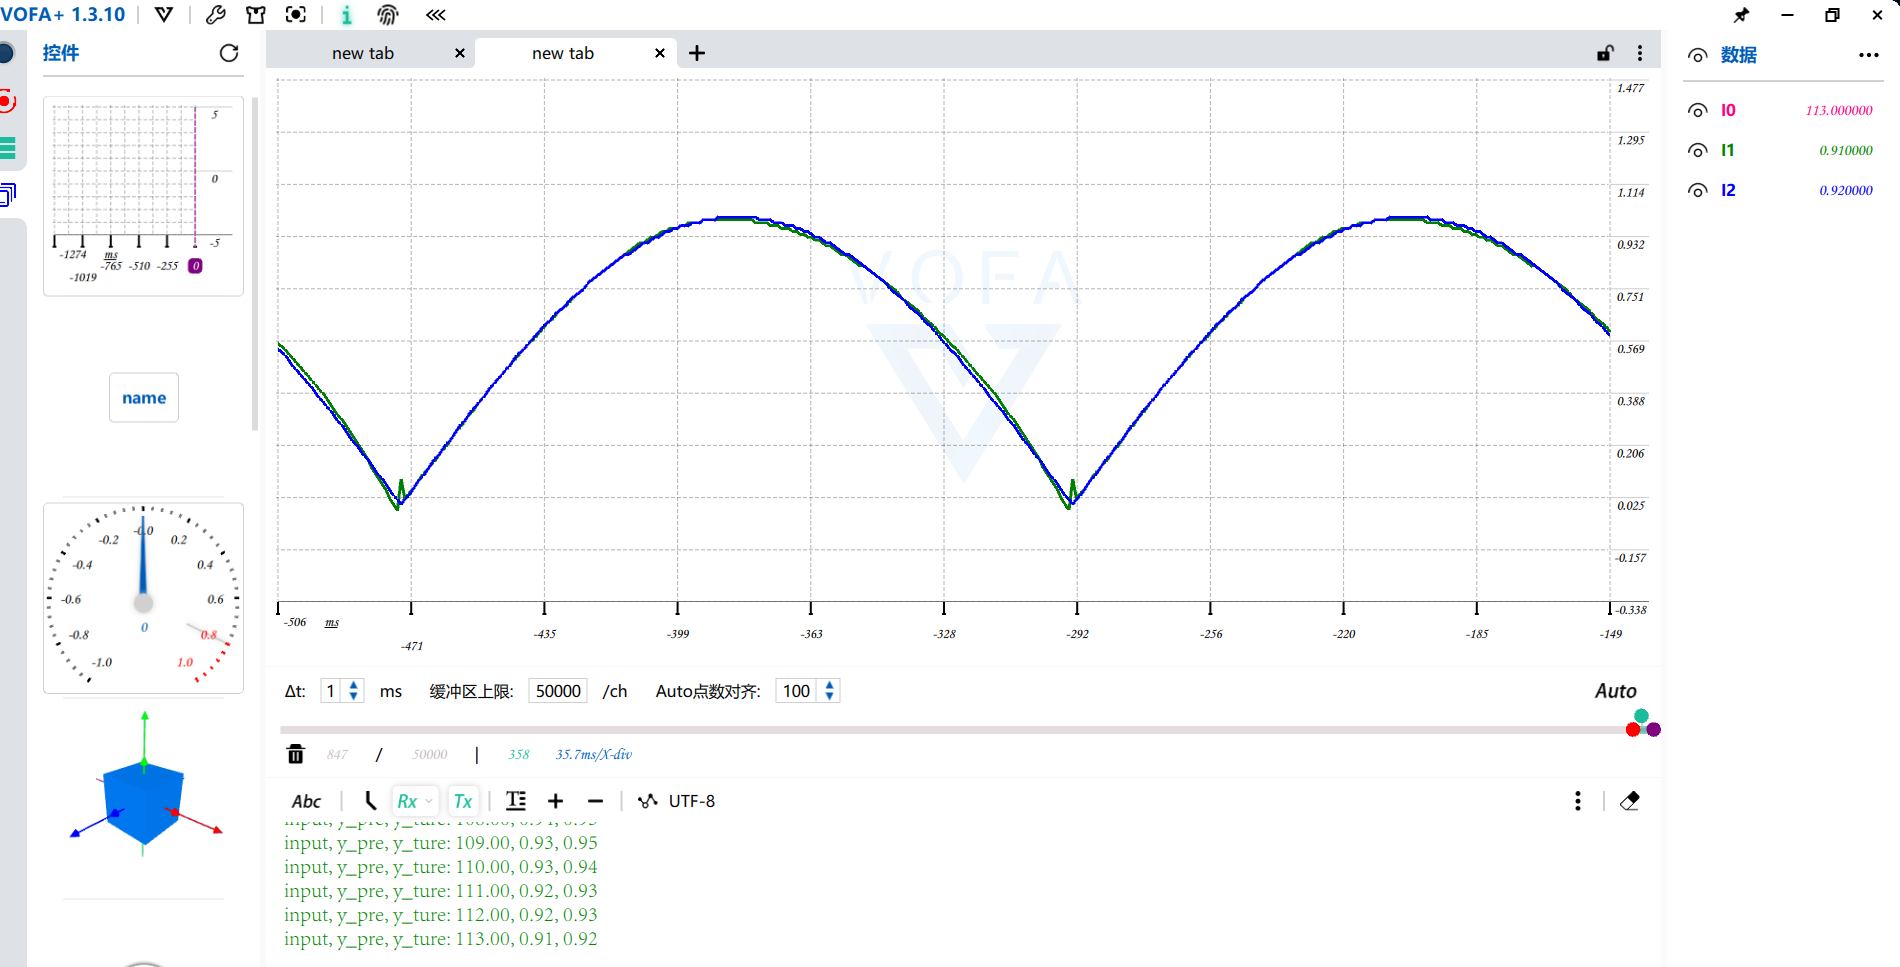
2.5.验证
通过串口传输出的数据到上位机VAFA,其中蓝色的线为准确的sin(x)的值,绿色的为模型输出的值,可以看到拟合的比较好,但是在接近sin(x)=0的附近,拟合的比较不好。